The Left Coast Handheld.

So, I decided to release the source of the entire thing and see what happens.
The 3D printable files : https://www.thingiverse.com/thing:4706082
All the bits that go into it :
Adafruit 2.8" capacitive touch screen
Adafruit 500 Powerboose/charger
Adafruit 3.7v 500mAh LiPo Battery
I needed a case..
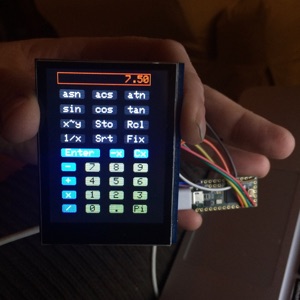
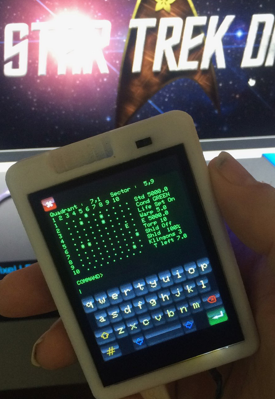
The Star Trek game

Next was the vacuum Gauge & Leak-down Handheld. I ended up just making the calculator case a little longer to fit in the vacuum hardware. After that was The Cellphone, then The PlantBot Programmer..
Each version added something to the design. The latest rendition was The Star Trek game. By this point I had a pretty nice case complete with a inset for accessing the SD card from the outside. Along with that I had the beginnings of a pretty nifty application framework written in c++.
I figured that other people may like to use this. It makes such a nifty little piece of hardware for building custom Handhelds.
Assembly Notes :
The absolute best wire I have found to use on these small projects is 30 awg silicon jacketed stranded wire. I buy mine from Adafruit and I buy every color they carry.
Silicone Cover Stranded-Core Wire - 50ft 30AWG
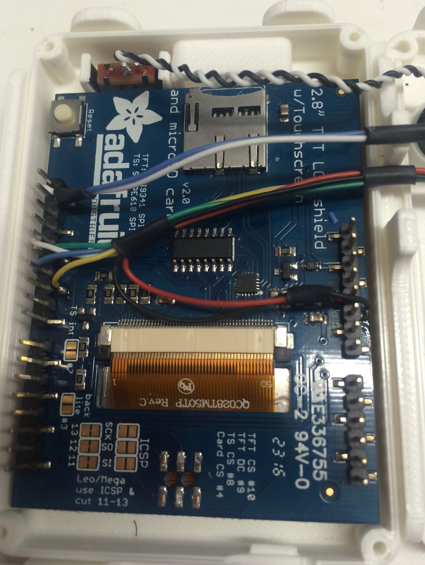
The trick is to wire the screen up in groups. SPI, I2C bus, chip selects, power, ground, switch, and lastly the back light solder pad controlling the screen. Wiring up in groups allows you to reuse wire colors while keeping track of what wire hooks where.

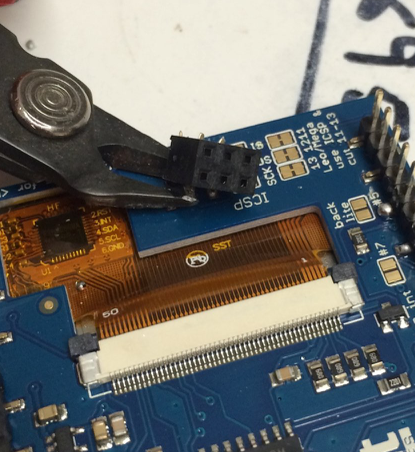
Notice also that the processor is mounted upside down.From this position you can get at all the wire connectors you need from the top down.
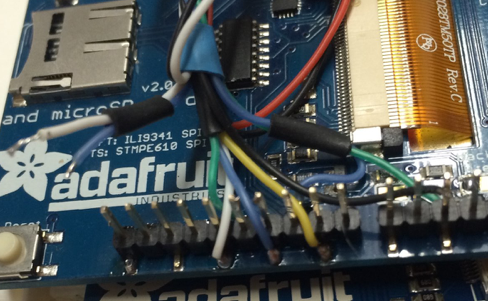
You can remove pins that get in the way of the wires if you like. But, don’t chop off the ones near the ends because these pins are what the entire display rests on when the unit is assembled.
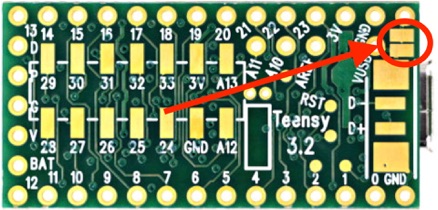
Where do the wires go on your processor? That depends on the code you decided to run on it.
My typical connections are...
SPI MOSI 11 - Blue
SPI MISO 12 - Green
SPI CLK 13 - White
SPI D/C 9 - Yellow
Screen chip select 10 - Blue
SD Card chip select 4 - Green
I2C data 19 - Blue
I2C clock 18 - White
Beep pin 23 - Red
Screen backlight 25 - Black
Example software
https://github.com/leftCoast/LC_handheld - Examples. And this relies on..
https://github.com/leftCoast/LC_Adafruit_1947 - Glue code for the display.
https://github.com/leftCoast/LC_GUITextTools - Text screen objects.
https://github.com/leftCoast/LC_bmpFileTools - Tools for getting .bmp images to the screen.
https://github.com/leftCoast/LC_GUIItems - Grab bag of base screen objects.
https://github.com/leftCoast/LC_GUIbase - Math foundation of the GUI stuff.
https://github.com/leftCoast/LC_baseTools - The tool kit everything is built from.